
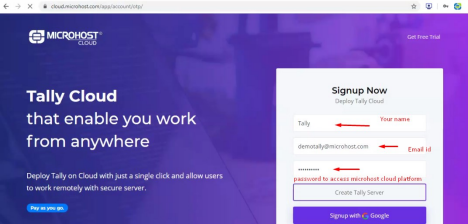
2. Once you fill your name, email id and password, click on create tally server.
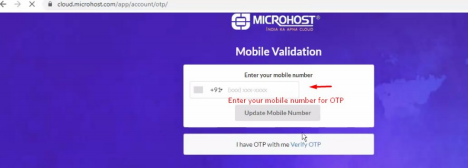
3. It will redirect you to the OTP page.
4. After signup you will be asked for your contact information.
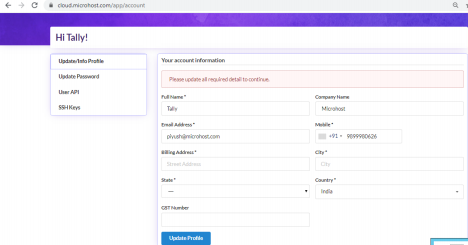
5. Once you enter all details after that cloud plaorm will be accessible properly. Now from the menu bar click on tally. Once you click on tally, it will show deploy tally Cloud. It can be seen in the screenshot below.
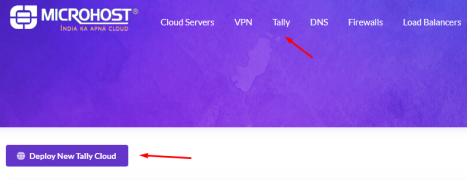
6. After clicking Deploy New Tally Cloud, you will see two options.
- a Select Datacenter Location. In this section click on Noida.
- b Select Tally Users.
- b1 . Tally Name – Enter name of your tally cloud
- b2 . Tally Users – Enter the number according to your user requirement, in the given screenshot, you can see mentioned two ( 2 ) in users section, it means only two tally users can be created after tally cloud activation.
- b3 . Billing Cycle – Select billing method according to your requirement. It can be monthly, quarterly, semi-annually, annually etc..
Once you will click deploy tally, it will redirect you to the payment page. After completion Payment, tally cloud deployment would start and it can take upto 20 minutes. After deployment, you will get confirmation over email.

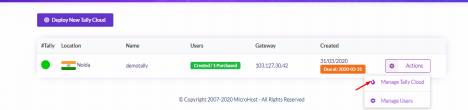
7. After activation of tally cloud, tally users can be deployed. In below screenshot it can be seen tally cloud deployed, now we will click manage tally cloud.
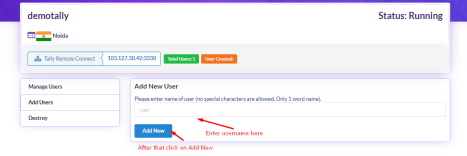
8. Once clicked on the managed tally cloud, it will be seen like the screenshot below. Now need to add a tally user from the Add User section.
( Please note that no special characters are allowed, Only 1 word name is allowed. )
Once you will enter user and click on Add new, user will be created and and login would be shared over registered email id.
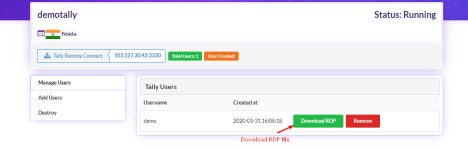
9. After user activation, there will be an option to download RDP and delete user. Now need to download an RDP file.
10 . After downloading the RDP file, open it by double clicking. It will be seen in the screenshot below. Once clicked on connect it will ask for a password.
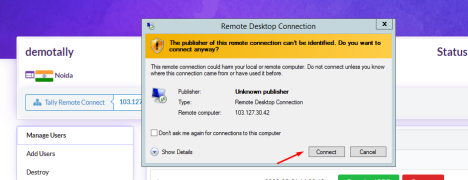
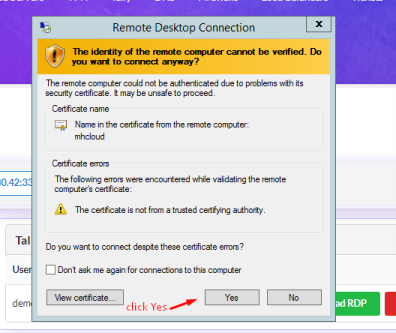
11. Aer clicking on connect, it will ask for a password, and need to enter the password which was received on email after user activation. Once you put the password, there will be a certificate warning shown, click on yes and it will open the tally cloud window.
Now the tally window would be open, it will show like the screenshot below. User need to enter their tally license key and start working.
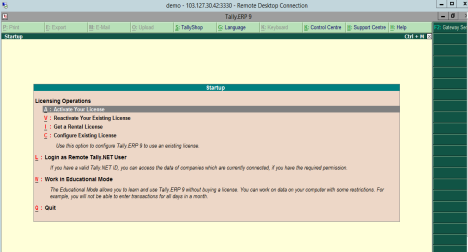
After completing the task click on quit, it would be log out from the tally cloud.
Steps to Upload Tally Data
After activation of tally cloud, you must receive FTP login details. Here are the steps to upload data by using FTP.
1. Download the filezilla setup according to your OS ( Operating System ) from here https://filezilla-project.org/download.php?show_all=1
You will see opons like windows 64 bit and 32 bit. Download according to your OS.
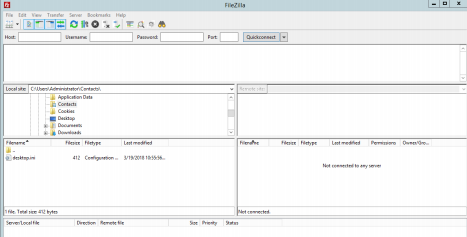
2. After downloading and installing, it will look like.
3. Now we need to use FTP login details which are received on email.
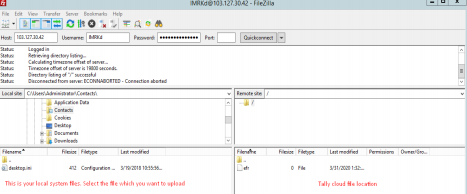
- In Host section mention your tally cloud IP
- Username: Your FTP username
- Password: Your FTP password
- Port: 21
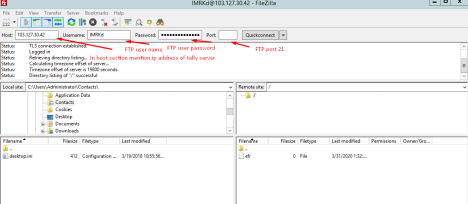
4. Once you will click on connect. It will look like the screenshot below. Upload your data from your local system to the server.
Thankyou.